I had a hard time deciding where to put this section. It’s a chicken-and-egg problem. You need the context of the Site Editor to understand other topics related to block themes, but you won’t understand the Site Editor until you understand those other topics.
If you didn’t fully grasp the sections that came before, there are 2 possible reasons why:
- I suck at writing.
- You lacked understanding of the Site Editor.
If it’s the former, make sure to let me know. If it’s the latter, you might benefit from quickly going over those sections again after you finish this one.
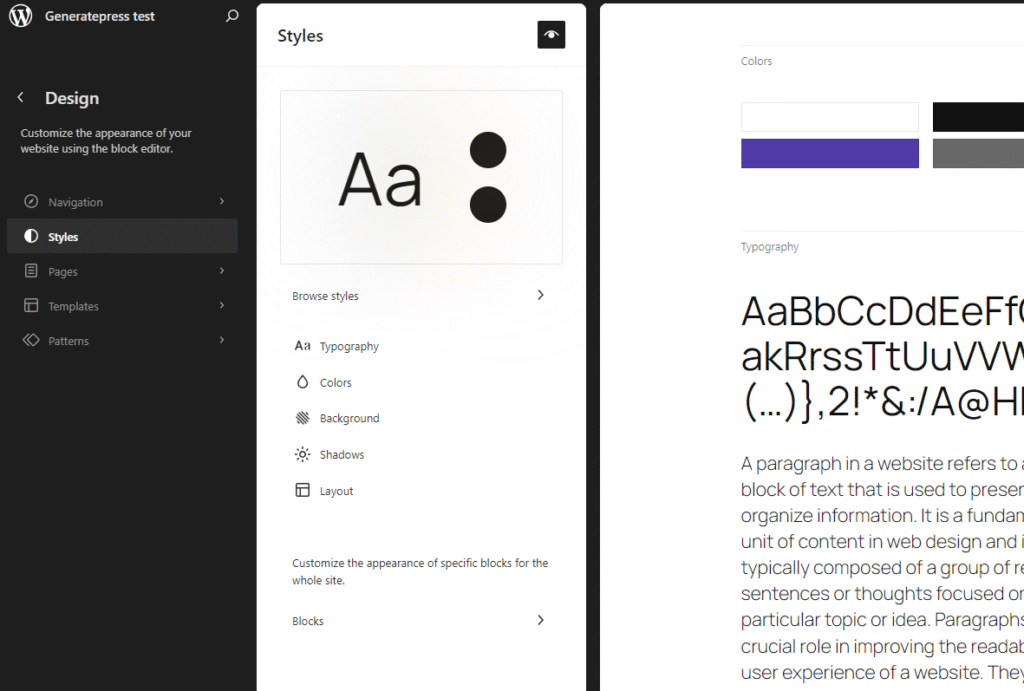
The Site Editor is the UI for Full Site Editing. That’s it. It’s the panel where you create/modify templates, manage navigation menus, change styles, and more. It’s only available in Block Themes, and you access it by going to Appearance -> Editor in the side menu of the admin panel. Here’s what it looks like:

You can see 5 top level links in the menu on the side:
- Navigation
- Styles
- Pages
- Templates
- Patterns
Navigation
Menus in block themes work completely differently than they do in classic themes. Let’s start with how they’re used in templates.
To put a navigation menu in a template, you have to use the core/navigation block. When you place this block anywhere in the editor, you’ll have the option to make it display one of your menus or you can create a new menu. The “navigation” tab in the Site Editor lets you do that as well. You can see all of your menus, edit them, delete them, and create new ones.
A menu is just a post. When you create a new menu, either when editing a template or from the navigation tab, you’ll do so in the Block Editor. Here’s what a menu looks like in the Site Editor:
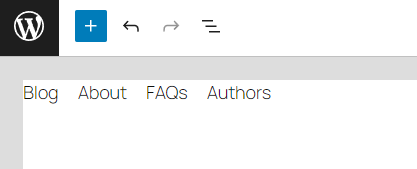
The contents of the menu can only be specific blocks, such as the navigation-link block or the navigation-submenu block. You don’t have to add those blocks manually from the inserter, you create the menu by typing the names and links and WordPress inserts the blocks automatically.
All menus are stored in the database. They are stored as posts with type wp_navigation. That’s what you’re editing on the screenshot above – the post_content column of this post. And here’s what that post_content might look like:
<!-- wp:navigation-submenu {"label":"Submenu test","type":"page","id":102,"url":"http://localhost:8001/custom-template-test/","kind":"post-type"} -->
<!-- wp:navigation-link {"label":"test hierarchy","type":"page","id":75,"url":"http://localhost:8001/sample-page/test-hierarchy/","kind":"post-type"} /-->
<!-- /wp:navigation-submenu -->
<!-- wp:navigation-link {"label":"customurl.com","type":"link","url":"https://customurl.com","kind":"custom"} /-->You can see those are just blocks, as you would expect. You can also see different types of blocks, and different types of links (internal page and custom link). The core/navigation blocks reference the selected menu the same way synced patterns do, with a {“ref”:ID} attribute. This means that if you modify a menu, this change will automatically be reflected everywhere the menu is used.
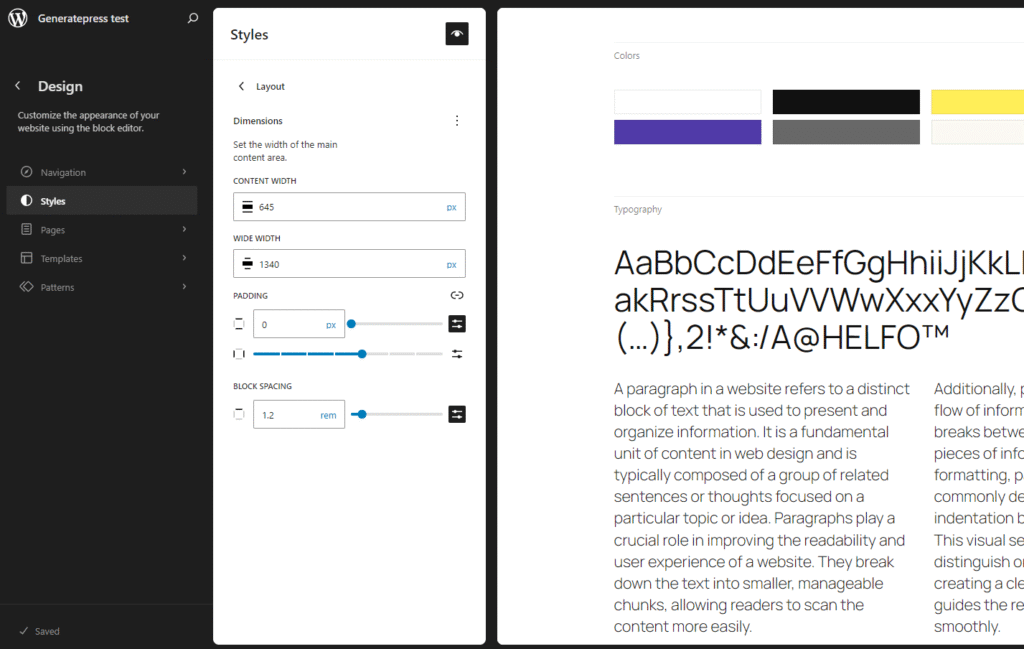
Styles
The styles tab is arguably the most important tab in the Site Editor. It’s where you modify your website’s global styles, typography, colors, block styles, etc. These modifications are stored in the database and take priority over the theme.json file. Keep in mind that what you see and can do here depends on the theme.json settings. Take a look at it:
There are 7 major, top level sections:
- Browse styles
- Colors
- Background
- Shadows
- Layout
- Blocks
Browse styles is where you can choose style variations. These are alternative theme.json-like files placed in the /styles folder. Here’s what this panel looks like (I had to delete some variations in devtools to make them fit on the screen):

You can see the style variations at the very top of this panel. If you hover over a variation, you’ll see its title. You can preview what your site will look like on the right after selecting a variation.
If you’re perceptive, you might be wondering – “What are those palettes and typography sections?”. This is exactly what I was wondering, and it turned out to be a very interesting rabbit hole. I must start with stating that what I’m about to describe is not documented at all (at the time of writing). It’s cutting edge WordPress functionality, and I had to discover it by experimenting with the Twenty Twenty-Five theme.
If you place a JSON file in the /styles directory and that file contains only color-related settings and styles, the file will become a palette variation. Same thing for typography – a file containing only typography-related properties becomes a typography variation. The moment you add any other property, the file becomes a full style variation.
WordPress seems to compare color and typography styles present in style variations with the available palette and typography variations. If a style variation has exactly the same color properties as a palette variation, when you select the style variation, the palette variation will also be automatically selected (a dark border will appear). The same goes for typography variations.
It’s hard to explain in words. When you select style variation A, the palette variation A and typography variation A are automatically marked as selected. That’s of course assuming the ‘color’ and ‘typography’ properties in style variation A match 1:1 those in the palette and typography JSON files. Btw, that system does not follow the DRY principle.
Palette and typography variations don’t have to match any style variations. They can be standalone styles for color and typography. In that case, when you select a palette/typography variation that does not match any style variation 1:1, no style variation will be marked as selected (have a dark border).
Do you think that’s confusing? Well, fasten your seatbelt. Let me ask you a question. Where do you think color and typography-unrelated configuration (e.g., spacing) is derived from when you select a palette variation that doesn’t match any style variation (i.e., no style variation is marked selected)? Does it fall back to theme.json?
The answer to that question is that it takes the last selected style variation. That means, if you:
- Select style variation A
- Select palette variation B (causing style variation A to be deselected)
- Save
The spacing configuration from style variation A will be used, even if it isn’t visually marked as selected in the Site Editor.
To add fuel to the fire, while playing with this system, I noticed that some palette variations disappeared and reappeared as I clicked on different style variations. I hope they write the documentation soon…
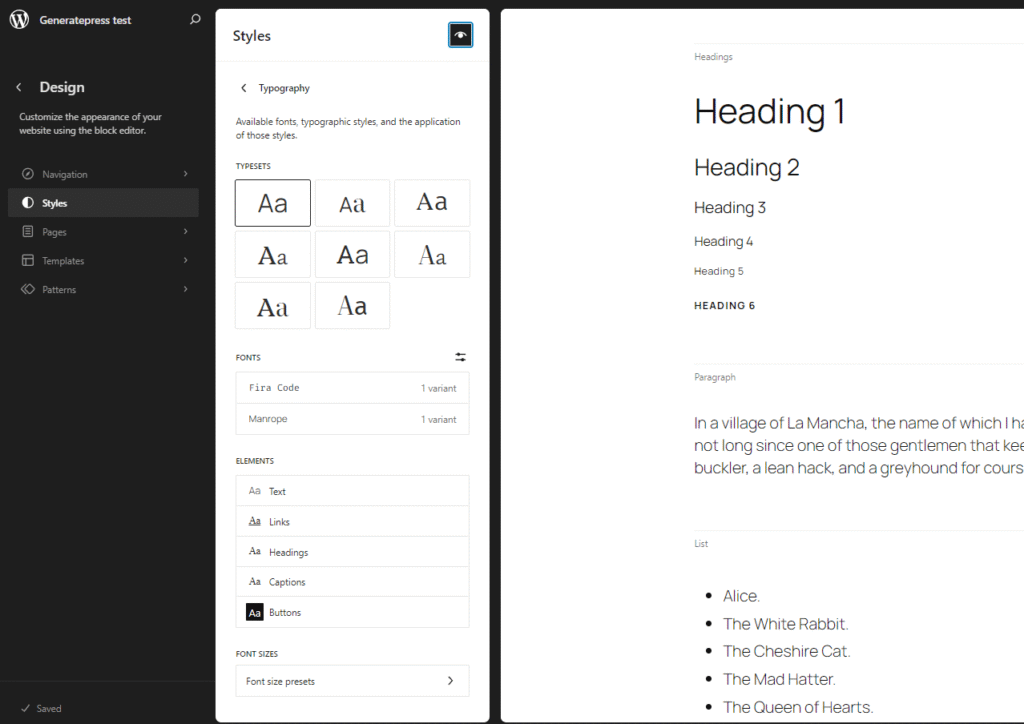
The typography tab allows you to modify typography-related settings. You can see the same typography variations here as we did in ‘browse styles’. You can do many things here, such as:
- Choose a typography variation.
- Upload your own fonts.
- Modify typography settings for text, links, headings, captions, and buttons elements. Those are properties like font family, font size, line height, letter spacing, etc.
- Modify existing and add custom font size presets.
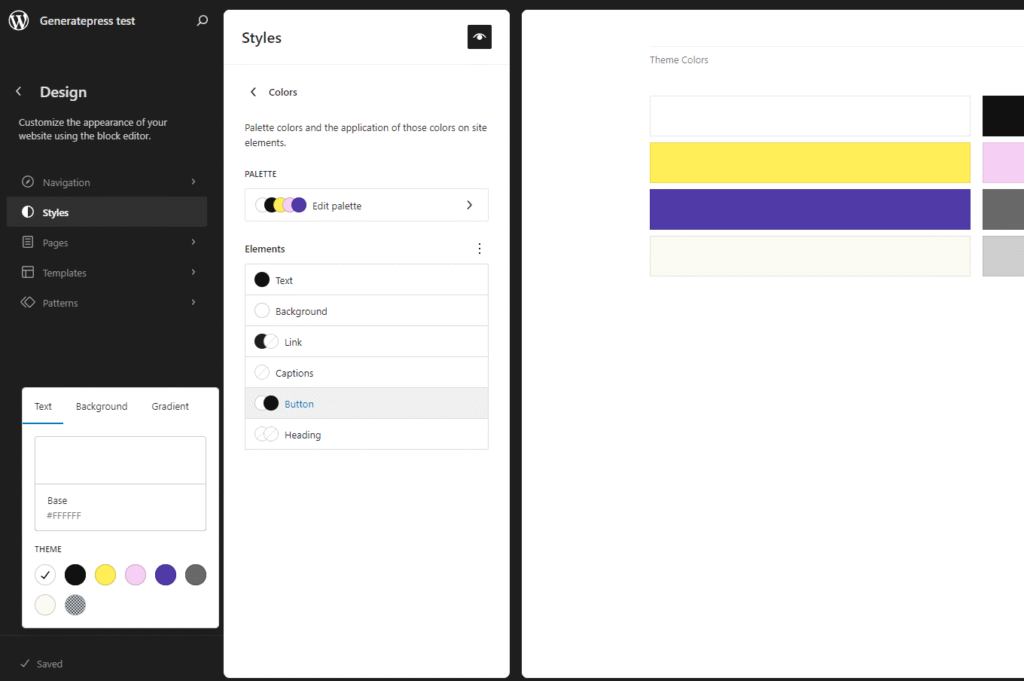
The colors panel lets you modify the active color palette, select a different palette variation, and change colors for text, background, link, captions, button, and heading elements.
The background tab allows you to set a background image (not worth a screenshot).
The shadows tab allows you to manage existing and create custom shadow presets (not worth a screenshot either).
The layout tab lets you control different properties related to the website’s layout. You can see the layout.contentWidth property we covered when talking about theme.json.
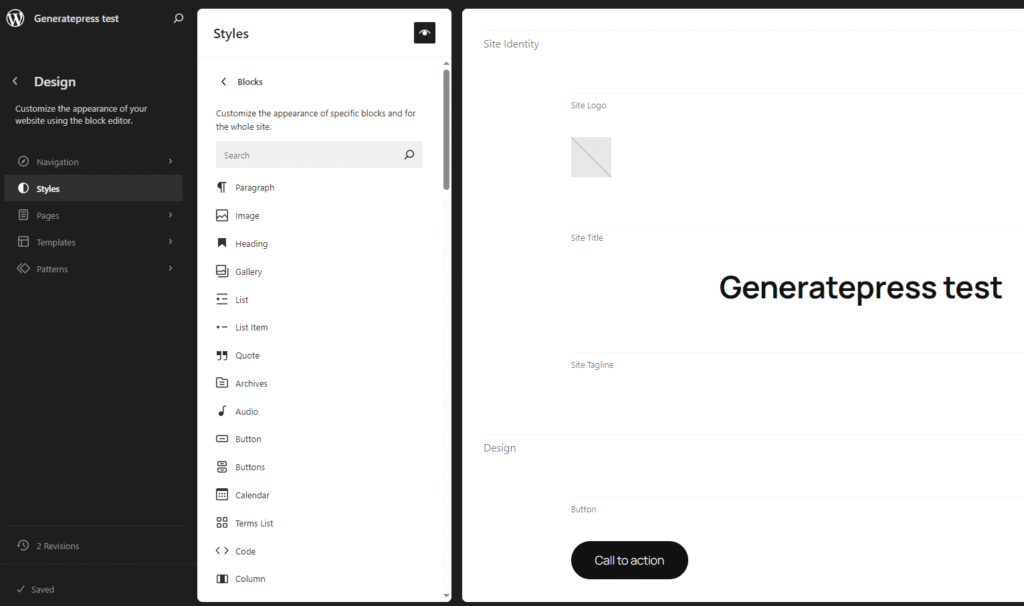
The blocks panel is a very useful part of the Site Editor. It allows you to modify the default style of some blocks. I don’t know for certain which blocks do and don’t show up here, but I’ve observed that blocks added with some plugins do not. Perhaps it’s an opt-in feature configured in the block.json file (either explicitly or implicitly). More testing would be required to get a definitive answer.
The styling options available for each block seem to match the styling options available directly in the Block Editor. Remember that you’re changing the default styling here. Any actively used blocks dependent on that styling will change, and any blocks with in-editor modifications to the updated properties will stay the same.
There’s one more thing we have to discuss here. If you clicked on any individual block, you could see a “style variations” section. The terminology in WordPress is very confusing, so I’ll remind you what those are.
Block style variations are the different styles you can create for blocks that the user can select with one click in the editor (e.g., rounded for a button). They are registered with PHP register_block_style() or with JS and result in “is-style-{name}” CSS class being added to the element.

If you remember the section on block styles, we said their authors were responsible for manually styling them and enqueueing their CSS files. But if a block style is styled directly with CSS, then it doesn’t go through the WordPress styling system. And if it doesn’t go through the WordPress styling system, how come we modify it in the Site Editor?
We’re once again entering undocumented territory. The following description is based on my observation and testing of the Twenty Twenty-Five theme.
Remember when I said block styles can only be registered with PHP and JS? That was a lie. Turns out they can also be created with JSON files. A JSON file placed in the /styles directory with a ‘blockTypes’ property becomes a block style.
The blockTypes property defines the blocks for which the style is to be registered. You should also specify a slug and a title. The rest of the file follows the theme.json notation you already know, and you should use it to specify the style. Let’s look at an example straight from the Twenty Twenty-Five theme:
{
	"$schema": "https://schemas.wp.org/wp/6.7/theme.json",
	"version": 3,
	"title": "Display",
	"slug": "text-display",
	"blockTypes": ["core/heading", "core/paragraph"],
	"styles": {
		"typography": {
			"fontSize": "clamp(2.2rem, 2.2rem + ((1vw - 0.2rem) * 1.333), 3.5rem)",
			"lineHeight": "1.2"
		}
	}
}A block style created this way does go through the WordPress styling system, which makes it possible to unite it with the rest of the UI. Block styles registered with PHP or JS will not show up in this part of the Site Editor.
Pages
The pages panel allows you to edit pages from the Site Editor. That’s it. You can view a list of all your pages, and if you click to edit one, you’ll see the exact same Block Editor interface you would’ve if you opened it from the WordPress pages menu. I guess it was added to bring as much of the experience directly into the Site Editor as possible.
Templates
The templates panel makes it possible to modify theme templates (single.html, 404.html, archive.html, etc.). If you click on a template to modify, it’ll be opened in the Block Editor. If you modify the template and save it, it’ll get saved to the database (as already explained before). You can also create new templates, including custom templates.

Patterns
The patterns tab allows you to view and create patterns. It’s also where you can find, modify, and create template parts.
You can see that template parts are categorized in 3 different submenus: “Header”, “Footer”, and “General”. These are the areas we’ve already talked about. Similarly, patterns are categorized into many different categories, which you can choose or create when adding a pattern.
